Library
DJWhat it's for — The Library is Track Prep's browse level: a searchable, filterable view of all your tracks across every connected source. Browse, find the right track, and open it for prep (from there you can also assign it to a Cue Pad).
It is not a separate screen. The Library is Track Prep's browse level. Typing "Library" into the Command Palette finds it and takes you to Track Prep with the Library tab selected.
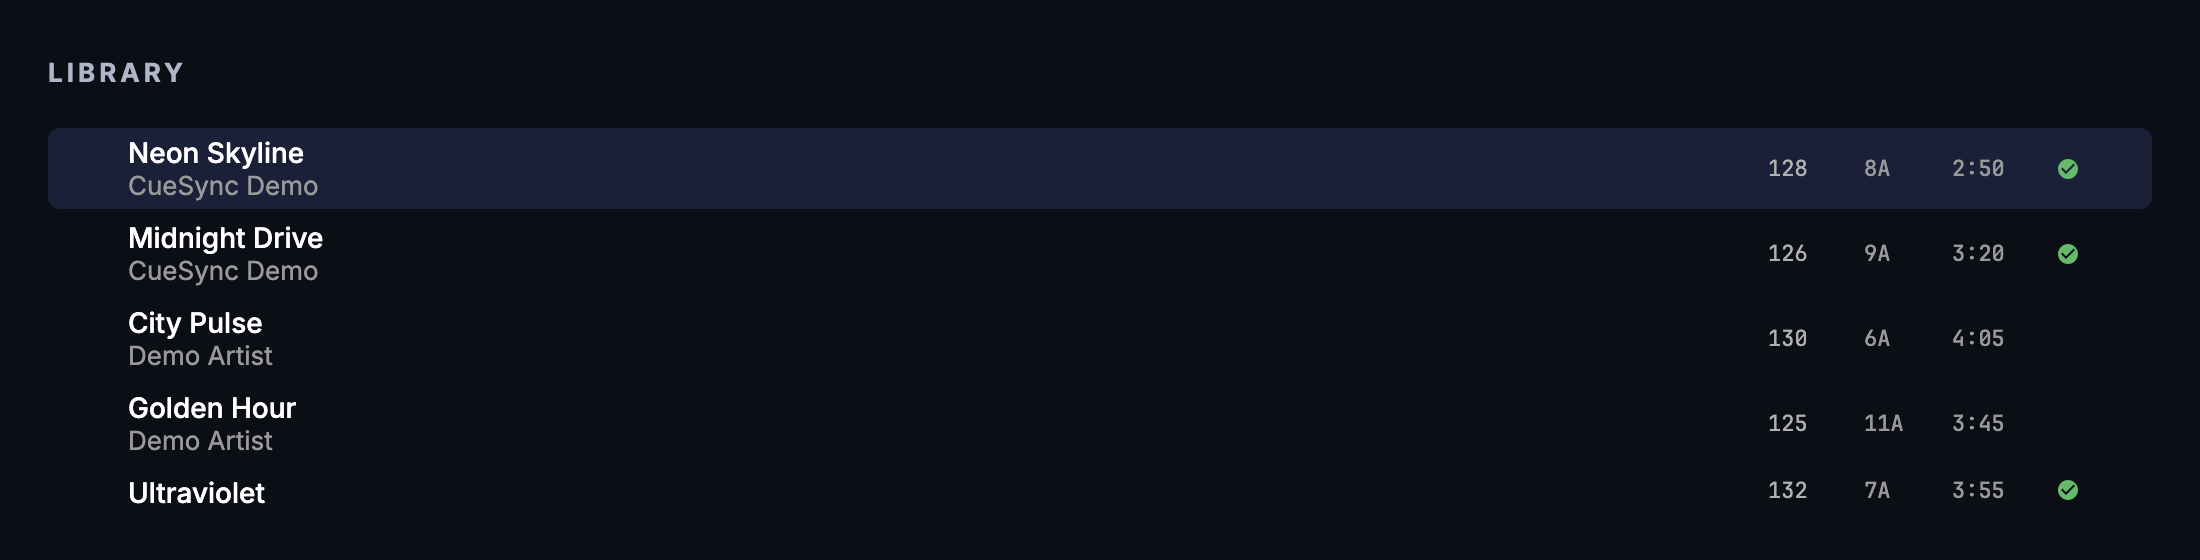
The screen, region by region
Source tree (left panel) — A tree listing every available track source:
- USB — Tracks on connected Pioneer USB drives, organised by playlist and folder as they appear in your rekordbox library.
- Local — Tracks in your configured local music folders.
- Live decks — Tracks currently loaded on connected Pioneer CDJ/XDJ players are shown at the top with a deck badge, so you can quickly find and prep what is playing right now.
Track list (main area) — Rows for every track in the selected source. Each row shows:
- Title and artist
- BPM — detected or rekordbox-confirmed tempo.
- Key / Camelot — musical key with a compatibility indicator relative to the track playing on the master deck (green = compatible key, amber = relative minor/major, grey = no relation).
- Genre badge — genre tag from your library.
- MATCH badge — lights up when the track's key and BPM are compatible with the currently playing master track.
- PREPPED badge — lights up when CueSync has a completed analysis for the track.
- AutoPilot profile chip — a track whose prep is bound to an AutoPilot profile names that profile on its row (hover for AutoPilot profile: name). A track with no binding, or one bound to a profile that no longer exists, shows none.
- Analysis chip (local tracks) — Analysing… while a local track is being analysed; Missing when its audio file was moved or renamed or its drive is not connected; Failed when the analysis could not finish (hover for the reason); No phrases, 1 phrase or Incomplete when the analysis is thin. A fully analysed track shows no chip.
Search bar (top of track list) — Filter by title, artist, or genre. You can also filter by BPM range — type a number like 128 to find tracks within ±4 BPM, or a range like 120-130 for exact bounds.
Sort controls — Click column headers to sort by BPM, Key, Title, or Artist.
Common tasks
- Browse a USB library — Expand the USB node in the source tree. Navigate playlist folders the same way they appear in rekordbox.
- Find a track by BPM — Type the target BPM in the search bar (e.g.
128). The list narrows to tracks within ±4 BPM of that value. - Find a harmonically compatible track — The KEY column shows compatibility with the master deck's current key. Tracks marked MATCH are in a compatible key and tempo.
- Send a track to Track Prep — Double-click any row to open it directly in Track Prep.
- Assign a track to a Cue Pad — From the track list within Track Prep, right-click a row → Assign to Pad. The Assign Pad dialog opens; pick the target bank and pad position.
- Check which deck a track is on — Tracks loaded on a connected deck show a deck-number badge on the left of their row.
- Select several tracks — Shift-click selects a range in the order on screen (Shift-click a nearer row to shrink it again), and
Cmd-click (Ctrlon Windows) toggles one row; either one switches the list into multi-select by itself, andShift+arrow grows the range from the keyboard. The check-circle button in the toolbar (Multi-select) turns it on and off, and in multi-selectCmd+A(Ctrl+Aon Windows) selects every track in view. The bar above the list then reads N selected with All and None. - Generate cues for the selection — Generate for N Selected runs the cue generator over the selection. A batch of more than 25 tracks asks first, saying how many it creates, how many unreviewed rows it replaces and how many reviewed rows it keeps. Prep you have reviewed — edited, test-fired or marked Ready — is kept. The whole run is one undo step (Generate cues for 40 tracks): undo puts back every row it replaced and removes the rows it added, and a track you edited since is left alone and counted.
- Set an AutoPilot profile for the selection — Set profile for N Selected opens a menu of your AutoPilot profiles (and None (clear the profile)) and binds the choice to every selected track that has saved prep, in one write and one undo step (Set profile for 5 tracks). Only the profile changes: the cues, their ready states and the rest of the prep stay as they were. A track with no saved prep has nothing to hold the binding, so it is left alone and the message counts it — 2 tracks selected have no saved prep, so no profile was bound to them. Playing a bound track activates its profile (Local Audio).
Tips & gotchas
- No USB drive mounted — the list is empty. Connect a Pioneer USB drive or configure local folders in Settings → Advanced → Library folders to see tracks.
- PREPPED badge means analysis is complete. Tracks without the badge show an analysis prompt when you open them in Track Prep, and auto-analysis will run if Auto Pilot is not armed.
- Assign to Pad is available from the track list. Right-click a row to assign it to a pad.
- The MATCH indicator updates live. As the master deck changes tracks, key-compatibility indicators across the whole list update immediately. Use this during a set to spot upcoming tracks that will mix well.
- Local folders need to be configured. Go to Settings → Advanced → Library folders to add folders. CueSync scans them and makes tracks available under the Local node.
Related
- Track Prep — Analyse and edit tracks you select here
- Cue Pads — The pads you assign tracks to from this screen
- Devices — Configure Pioneer deck connections
Looking for a quick fix?
The Help Center has short task-focused articles and a support team that responds within 24 hours.